Did you know you can cultivate an apple sapling from discarded apple scraps in just a matter of days? Discover how to nurture a thriving plant without spending a dime.
Apples, often dubbed the fruit of health, are widely consumed. Comprising mainly water, they contribute to a sense of fullness, making them ideal for weight loss diets. But here’s a secret: beyond their nutritional value, apples harbor the potential to birth new life in the form of saplings.
The process of germinating seeds and nurturing saplings is simpler than you might think; oftentimes, a single germinated seed will suffice. Within the heart of an apple lies an array of seeds, serving as the foundation for cultivating your own apple plant. Over time, this small endeavor could evolve into a magnificent tree, albeit requiring a good dose of patience.
Cultivating an Apple Sapling: Transforming Scraps into Life
Let’s explore how you can create a thriving apple sapling from what would typically be discarded – the core and seeds. In the following paragraphs, we’ll guide you through each step, offering tips for a successful venture that requires minimal effort.
Growing an Apple Plant: Nurturing from a Seed

As mentioned, the journey to nurturing your own apple tree begins with a seed extracted from a ripe apple. Creating a sapling is a relatively swift process, yet it demands patience due to the extended timelines for fruiting and tree growth. While you may not witness the fruition of your labor in the immediate future, over time, your efforts may bear sweet rewards.
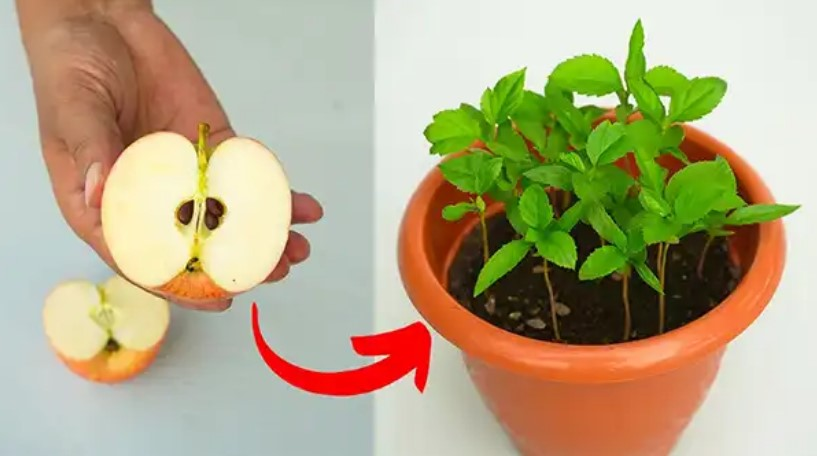
Begin by selecting a mature apple. Gently cut open the apple, ensuring the central part containing the seeds remains intact. Carefully stop the knife just before reaching the center, then utilize your hands to expose the seeds. Once you’ve collected the seeds, it’s time to initiate the germination process.
Seed Germination: Awaiting the Miracle
Procure a plastic or glass container with an airtight seal. Line the interior with a white cloth napkin, then place the seeds inside. Seal the napkin, and using a spray bottle, lightly mist water over it. The napkin should be damp, not saturated. Seal the container and let it bask in sunlight for 10 days (avoid direct sunlight exposure).
After this period, open the container and inspect the seeds for signs of germination. Vigilance is crucial to prevent mold formation. Now, it’s time to plant the germinated seeds while leaving any ungerminated ones in the container. Obtain a 10 cm diameter pot and fill it with peat soil. If unavailable, high-quality, soft, and well-draining universal soil will suffice.
Planting and Nurturing Your Sapling
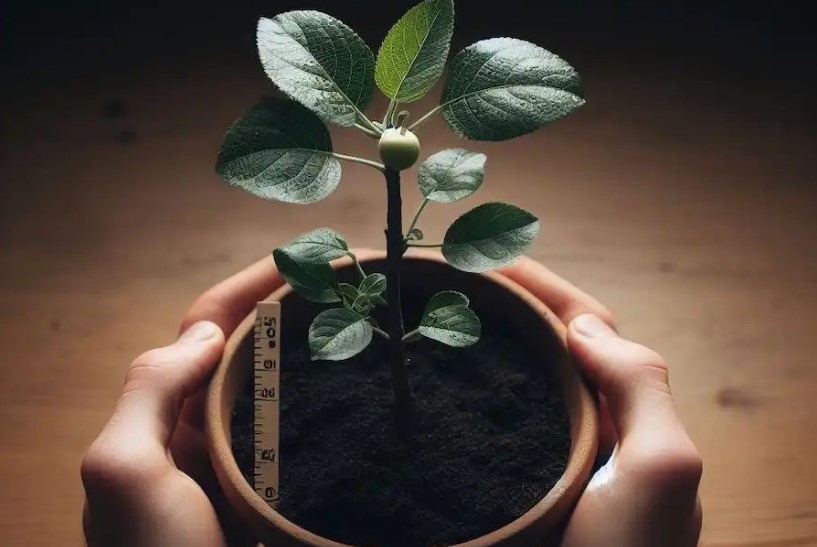
Create a hole approximately 3 to 4 cm deep. Using tweezers, delicately place the germinated seed into the hole with the root facing downwards and the seed upwards. Take care not to damage the delicate structure. Cover the seed with soil and mist with water using a spray bottle. Position the pot in a well-lit area, avoiding direct sunlight exposure.
Over time, you’ll notice the sprout growing taller. Within around 7 days, a tiny 4 cm sapling will emerge. After a month, the first leaves will begin to flourish. As the plant continues to thrive, it will gradually grow taller. Once the plant reaches a height of over 1 meter and a trunk diameter of 1 cm, it will be ready for grafting.
308106 945570Great beat ! I wish to apprentice even though you amend your internet website, how can i subscribe for a blog internet site? The account aided me a appropriate deal. I had been a little bit acquainted of this your broadcast provided bright clear notion 703813
694318 81980Following study some of the websites along with your internet web site now, i genuinely as if your way of blogging. I bookmarked it to my bookmark site list and is going to be checking back soon. Pls look at my site likewise and figure out what you believe. 619875
809543 928959Today, while I was at work, my cousin stole my apple ipad and tested to see if it can survive a thirty foot drop, just so she can be a youtube sensation. My apple ipad is now destroyed and she has 83 views. I know this is completely off topic but I had to share it with someone! 667049
215457 954398Read more on that Post.Helpful information. 995386
416400 737408I think one of your advertisements triggered my internet browser to resize, you might want to put that on your blacklist. 633018
651946 281689This website is my breathing in, real wonderful style and perfect content material . 435009
128901 760650How can I attract much more hits to my composing weblog? 768660
361394 230638Ive applied the valuable points from this page and I can definitely tell that it gives plenty of assistance with my present jobs. I would be really pleased to maintain finding back in this web page. Thank you. 681450